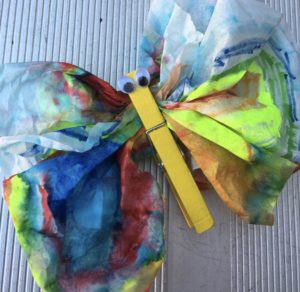
Students will be able to create a butterfly out of everyday art supplies.
Materials Needed:
- Coffee Filters
- Markers
- Watercolor Paint
- Clothespins
- Pipe Cleaners
- Google-y Eyes
- Glue (we recommend hot glue if a parent is available to assist)
Instructions:
- Have the children lightly paint their coffee filters with the water colors. These will be the wings of their butterflies. Remind them to only lightly paint them so that they do not become too wet and will dry in time.
- Encourage the students to paint different designs with the water colors. They can use different patterns just like on real butterflies.
- As students finish up painting their coffee filters, have them put it to the side. Make sure none of the filters are too wet, if so try dabbing with paper towels to absorb any excess water. Clean up the watercolor paint. Start to pass out one clothespin to each student as well as markers. Each student may now begin to color and decorate all sides of the clothespin. This will be the body of the butterfly.
- Continue to have the students decorate their butterfly bodies and encourage them to add details if they move along too quickly. Remind them once again that butterflies have all sorts of patterns on their bodies as well.
- Plug in the hot glue gun for teachers only. Once the students are done with their designs on the bodies, they may bring them up to get google-y eyes glued onto the bodies.
- As time has passed by, the coffee filter wings should be dry. Have the students fold the coffee filters back and forth like an accordion then pinch it in the middle. After it has been folded and pinched in the middle, the students may open up the clothespin and slip the filter in the middle where it is pinched. Spread open the filter to make the wings bigger, if desired.
- Once the students have their butterflies assembled, cut a pipe cleaner in half. Then slip each half of the pipe cleaner at the top of the clothespin to create the antennas of the butterfly.

Activity by Kelly Moy, Schofield Site
